My Process for Writing Docker for PHP Developers
On January 23rd I released my third book, Docker for PHP Developers, that teaches PHP developers how to use Docker as a development environment.
Within the first three days I sold 233 copies and 284 copies in the first week, my best release so far!
The Docker for PHP Developers book is available right now! The launch price for the next three days is 25% off! 🎉💖https://t.co/zJKLWPMDds
— Paul Redmond 🐳 (@paulredmond) January 23, 2018
I approached this course differently than my first book—Writing APIs With Lumen—and I thought I’d share how I produced the text in my course from start to finish.
Outlining My Ideas
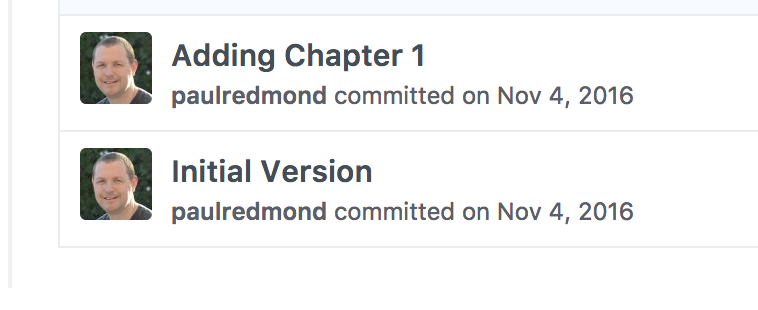
The course has been in my head for about three years, and my first commit was back in November 2016:
I am kind of glad that I didn’t start getting serious about the course until about a year ago because Docker has changed tremendously.
When I start writing a new book, my first goal is to provide a high-level chapter outline. At this point in the process, I throw out as many chapters as I can, even if the number is in the teens or even twenties.
After I have a list of potential chapters, I try to sort and give some context to the ideas from the readers perspective, prefacing everything with something like “as a reader…”:
- As a reader, what skills do I need to know before taking this course?
- As a reader, what is the first thing I want to learn that catches my interest in the topic?
- As a reader, do I want to jump right in, or do I need a gradual introduction?
And so on…
Once I shuffle around chapters, reword some, and provide some sense of order, I am ready for a sounding board.
Testing the Waters
I am somewhat an introvert, so I didn’t test out some of my ideas in public. Plus, I didn’t have hardly any social following at the time and didn’t invest much in social media.
Instead, I grab a few of my colleagues (pick people that you trust to tell you the truth) and I start pitching the whole idea and the chapter organization.
My goal here is to cut, cut, and cut more. In this process for Docker for PHP Developers, I went down from 16 chapters to 10. Some of the sections I cut were good ideas; however, I want a concise book that tries to get to the point.
Some of the good ideas that got cut will make better screencasts anyway, and I am trying to position my products as a course and not just a book.
Organizing the Manuscript
Once I have the revised outline, I start organizing the manuscript so that I can get to the rough draft. I try not to procrastinate the writing portion because getting invested into writing the manuscript is the most critical part of the process if you want to finish.
I like to use Leanpub for the manuscript because they have a really nice set of markdown tools that you can use to iteratively preview your book.
When you create a book in Leanpub you can pick which workflow you want to use to write your book. Leanpub has a few options you can use to write and sync your book, and I prefer GitHub (private repository) with a combination of syncing the previews to Dropbox:
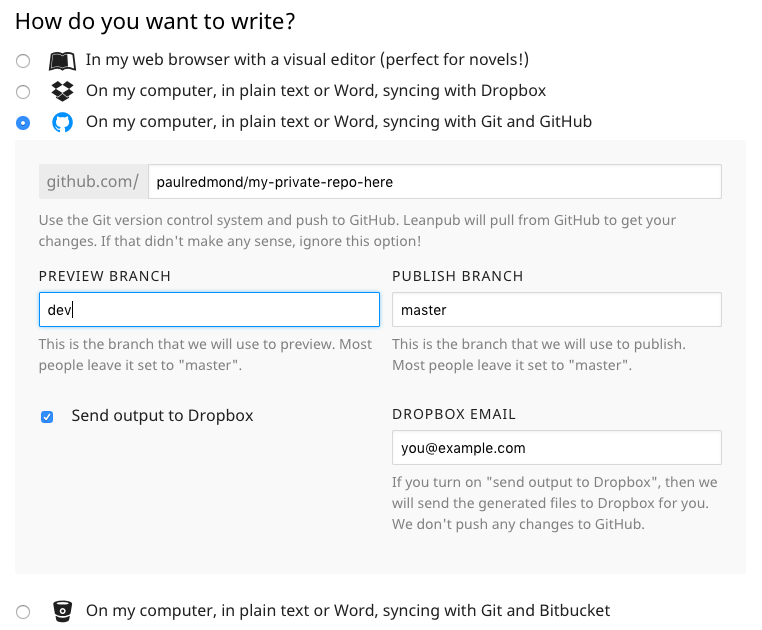
With this workflow, I set my main branch in GitHub to dev, and my publish branch to master. Pushing to master will not automatically publish your book, but I like to keep master as a clean branch that contains squashed pull request merges.
Once you have your GitHub project set up and Leanpub configured, I recommend setting up a webhook in GitHub so you can get automatic preview updates.
If you checked “Send output to Dropbox” the webhook will trigger a preview build automatically when you push to the branch you configured for previews.
The Dropbox feature is nice because you can commit your code to GitHub, and within a few minutes automatically have a PDF, ePub, and Mobi copy.
If you sync Dropbox to your computer, you have a nice feedback loop that gives you quick results of a preview PDF.
Leanpub reads your book by looking in a manuscript folder of your code repository. Inside of the manuscript folder is a Book.txt file, which is the main file that imports the content of your book.
From the Book.txt file, you can import your chapter files and other content before your first chapter (front-mater) and after your final chapter (back-matter).
You can organize the book however you want, but here’s what works well for me, this is my Book.txt file:
frontmatter.txt
mainmatter.txt
chapter01.md
chapter02.md
chapter03.md
chapter04.md
chapter05.md
chapter06.md
chapter07.md
chapter08.md
chapter09.md
chapter10.md
backmatter.txt
conclusion.md
An here’s a tree view of my GitHub project:
├── .gitignore
├── manuscript
│   ├── Book.txt
│   ├── Sample.txt
│   ├── Subset.txt
│   ├── acknowledgments.md
│   ├── backmatter.txt
│   ├── chapter01.md
│   ├── chapter02.md
│   ├── chapter03.md
│   ├── chapter04.md
│   ├── chapter05.md
│   ├── chapter06.md
│   ├── chapter07.md
│   ├── chapter08.md
│   ├── chapter09.md
│   ├── chapter10.md
│   ├── conclusion.md
│   ├── frontmatter.txt
│   ├── images
│   │   ├── bitpress-logo-black.png
│   │   ├── ch01
│   │   ├── ch02
│   │   ├── ch03
│   │   ├── ch04
│   │   ├── ch06
│   │   ├── ch07
│   │   ├── ch08
│   │   ├── ch09
│   │   ├── ch10
│   │   ├── paul-profile-400x400.jpg
│   │   └── title_page.png
│   ├── introduction.md
│   ├── mainmatter.txt
├── readme.md
└── resources
You can see the full thing if you want to see how I organize my other project assets outside of the manuscript folder, such as my Sketch art and my custom Scribus PDF files.
Leanpub uses three unique tags to separate the chapter portion of your book from the introduction and appendices with these unique tags, respectively: {frontmatter}, {mainmatter}, and {backmatter}.
I use a file called frontmatter.txt, mainmatter.txt, and backmatter.txt which just contains one line respectively for each type:
{frontmatter}
With my approach it’s straightforward to see in the Book.txt file where the introduction gets divided from the chapters (Partial of Book.txt):
frontmatter.txt
mainmatter.txt
chapter01.md
...
And at the end it’s straightforward to see the {backmatter}:
chapter10.md
backmatter.txt
conclusion.md
Two other important files in the manuscript folder that will help your workflow are Subset.txt and Sample.txt. What’s nice about the Subset.txt file is that when you have a bigger book, you can generate the preview faster by changing the contents of Subset.txt, which just imports other files just like Book.txt does:
chapter06.md
chapter07.md
You trigger a subset preview by visiting the Leanpub book admin area and select “‘Subset preview’ on your book’s ‘Preview’ page in the Leanpub book tools, and click ‘Create Preview.’”
Because of my GitHub webhook, my preview PDF continues to update while I work on my chapters, which is cool, but I try to carefully ignore it in the middle of writing a chapter, so I don’t shift into editing mode.
Before I move on, I find it ** advantageous ** to create all the chapter files, front- and back-matter, and import them into the main Book.txt.
Even if you just add the main heading for each chapter, it motivates me to keep moving forward because the book already has a sense of organization, I just need to fill in the blanks ;).
Starting in the Middle
For me to get excited as a writer, I don’t want chapter one to be my first task. In an introductory text, the beginning chapters need to cover installation and “hello world” type information.
While it’s critical to nail the beginning chapters in a beginner book, it’s not the most glamorous part to write. In fact, the beginning pages are usually the last pieces I write.
As a bonus, writing the first few chapters last allows you to tie the whole introductory ribbon on the text as you have a more in-depth perspective of how to stitch the book together.
With that being said, I like to start around chapter three or four, or maybe even a little later. I have an idea of the cohesive whole, without the details of the manuscript on paper.
I look for the point in the text that could be equated to the rising action part of Freytag’s pyramid. At the action stage of the story, the reader will have passed the introduction and set out to dive more deeply into the topic at hand.
This is the part where you/they should catch the bug and really connect.
Another benefit of starting in the middle is that you can just narrow your focus on the topic without all the distractions of introducing the reader.
Writing a Chapter
In Docker for PHP Developers the book is very hands-on, so the first thing I do when writing a chapter is review the main subtopics of the chapter in my outline so that my code follows the main points.
Next, I try to think of how I could iteratively teach the reader, and I find that writing code and then explaining it as I go works for me. I don’t write all the code in isolation, nor do I try to write the chapter words without using code examples to drive the message.
For example, I skip the intro in the chapter (just like I skip the first couple of chapters in the book) and dive into the first code example. Once I have the code working (I use a separate repo to write the code and store it in git) I pop the code in the manuscript using Leanpub’s dialect of Markdown:
Some text here, this is how you do the thing (Listing 4.1):

{title="Listing 4.1: Explain the Thing",line-numbers=off,lang=php}
~~~~~~~~
<?php

$do->theThing();
~~~~~~~~
I prefer a somewhat formal style of listings, so it’s easier for me to search through them during editing quickly, and it’s easier for a reader to convey to me which part of the text isn’t working for them, or which listing they need help understanding further.
You may have noticed that I like to put the listing number somewhere right before the code listing. You can come up with your style, but has worked pretty well for me so far!
Inside of a chapter file, Leanpub uses the Heading 1 (H1) as the title of the chapter in the table of contents automatically and will add the “Heading 2’s” as subsections in the table of contents. My outline essentially helps me design the table of contents. Remember, at a latest stage, you’ll likely revise sections and maybe even rearrange chapters.
You can have further sections under “Heading 3’s” to provide more organization under each subsection of your chapter.
I also find it useful when I start a new chapter to put in all the headings first and then start writing under the first headings until I work through the chapter. Writing the headings first reminds me of the main points of the chapter while I work on the draft:
# Chapter 1

## First Subheading Topic

## Second Subheading Topic

## Third Subheading

## Conclusion
Having the sections outlined first for each chapter gives me this little mental bump to keep going, and it’s just what I need to get started on a new chapter. In fact, I take my original outline and create all of the chapter headings at once.
The Tools I Use to Write Words
Getting into a writing groove is a critical shift from a development frame of mind. Here I use a different set of tools to give my brain a break it needs from a code editor.
I use iA Writer to write my manuscripts in Markdown with Leanpub. What I love about iA writer is that it puts me in the right mood to write copy. It has that typewriter feel to me, it’s super minimal, and I love the sentence focus mode:
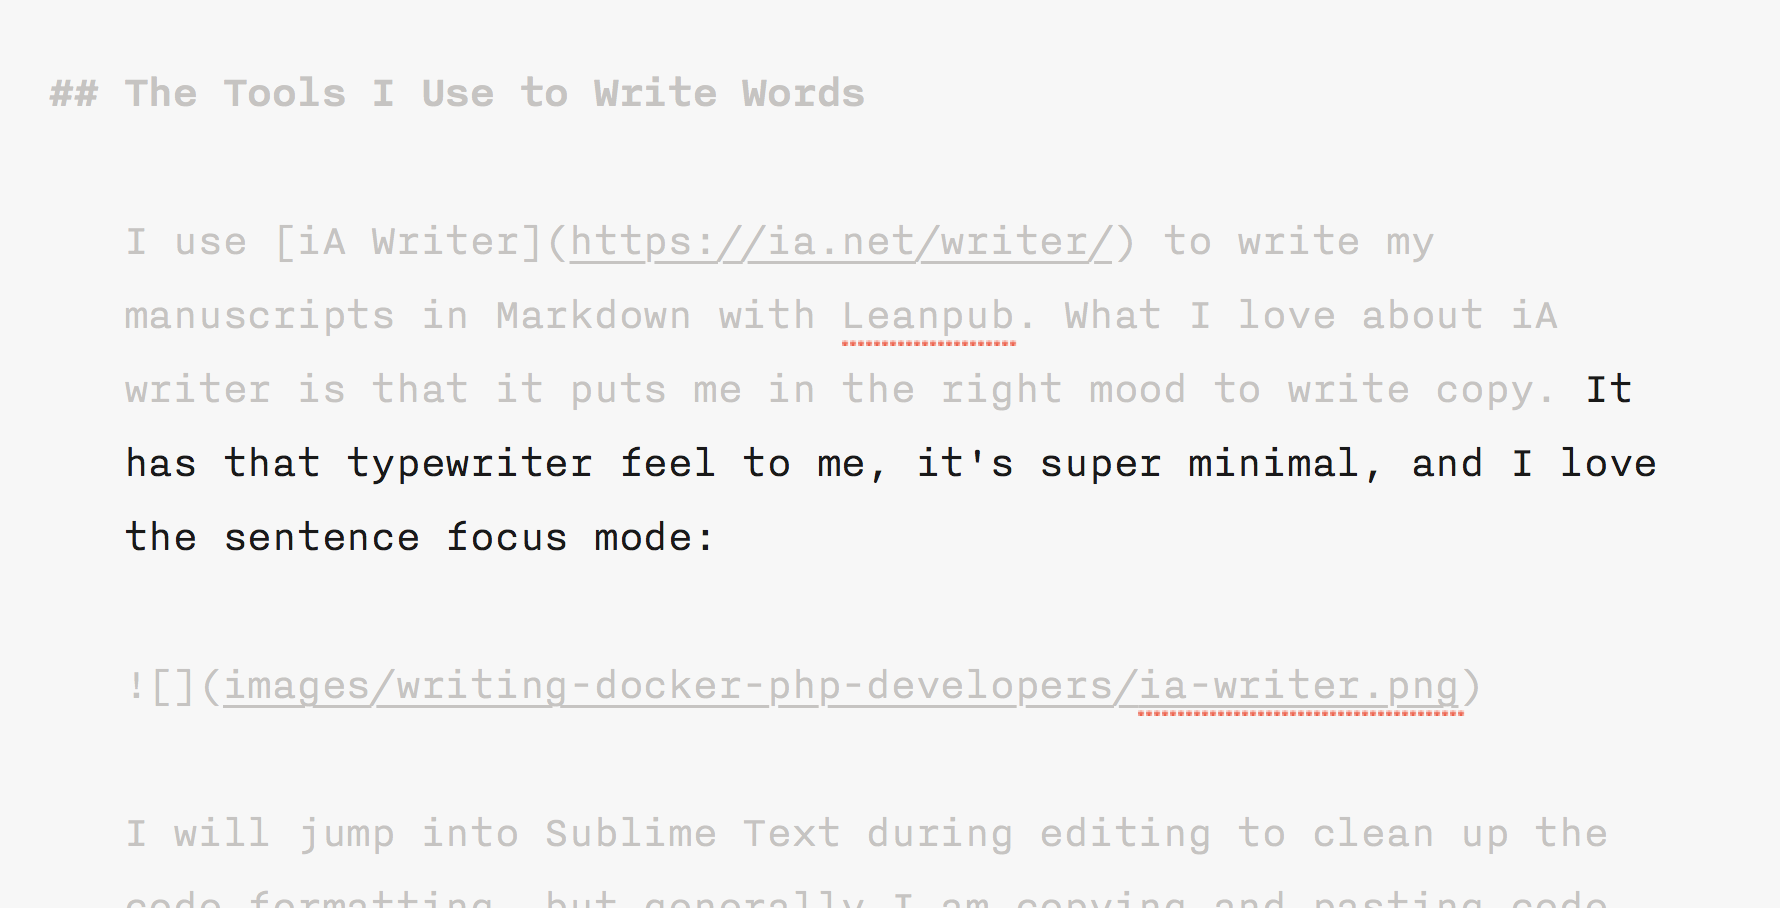
It feels pretty amazing to show you a screenshot of the article I am writing while I write it, in case you’re wondering.
Getting into the right frame of mind and avoiding writer’s block is the most essential thing in my process, and for me, the editor experience helps shift gears. When I’m writing code all day in a text editor switching to iA Writer reminds me I am writing not coding.
If you don’t want to foot the cost of a separate app, another technique I find useful is to use a light theme for writing if you typically use a dark theme to write code. This mental shift might be enough, and you can benefit from your editor’s snippets to create things like code listings:
Here’s an example of a code snippet you could use for VS Code:
{
    "Leanpub Code Block": {
        "prefix": "lpcode",
        "body": [
            "{title=\"Listing $1: $2\",line-numbers=$3,lang=$4}",
            "~~~~~~~~",
            "$0",
            "~~~~~~~~"
        ],
        "description": "Adds a code block to a leanpub markdown document"
    }
}
I feel that my writing experience is worth forgoing the snippets a text editor can provide, and then when I am editing I typically use Sublime Text to work on edits quickly.
I will jump into Sublime Text during editing to clean up the code formatting from time-to-time, but I mostly copy/paste code from my work-in-progress repository—the repository with the actual running code so I can make sure what I am writing works—and the manuscript.
Editing
My workflow for editing is the ensure that I don’t start until I’ve written the entire manuscript. Once I am ready to start editing, I add each chapter to my Trello board and start running each chapter through Grammarly pro:

I use Grammarly pro (the paid $29.99/mo version) to work through the obvious grammatical errors. Make sure that you change over to the technical format, which catches things related to writing technical works that the general setting doesn’t cover:
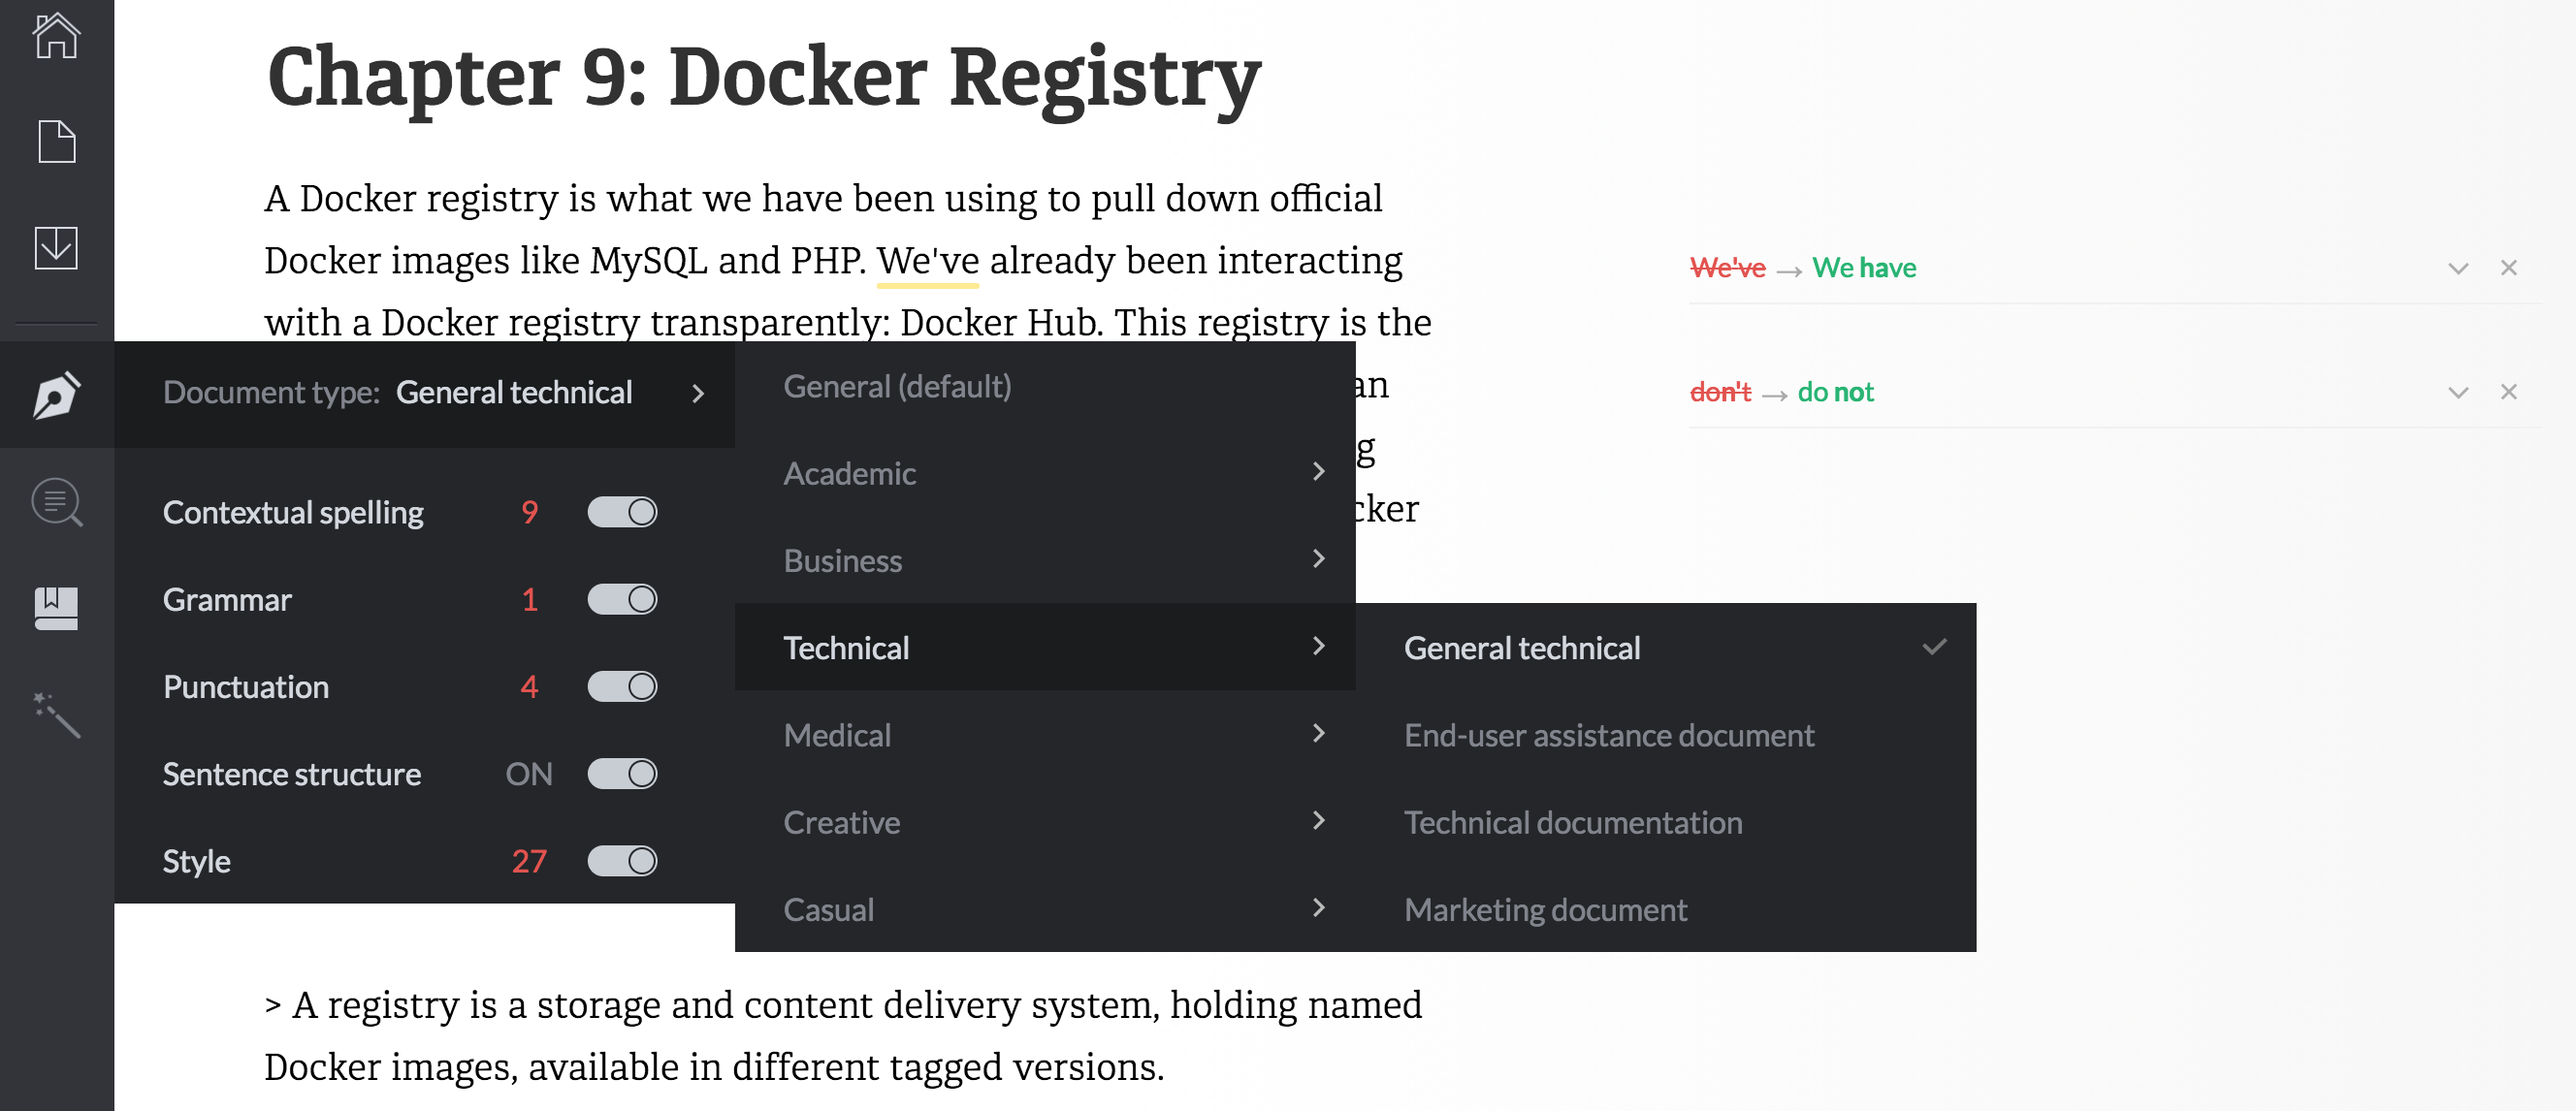
If you look closely, Grammarly suggests avoiding contractions in technical writing. However, I want my books to have a more personal tone, so I don’t apply the contraction suggestions in all places (and change places where dropping the contraction reads more clearly).
An important check you should pay attention to is the future tense in technical writing:
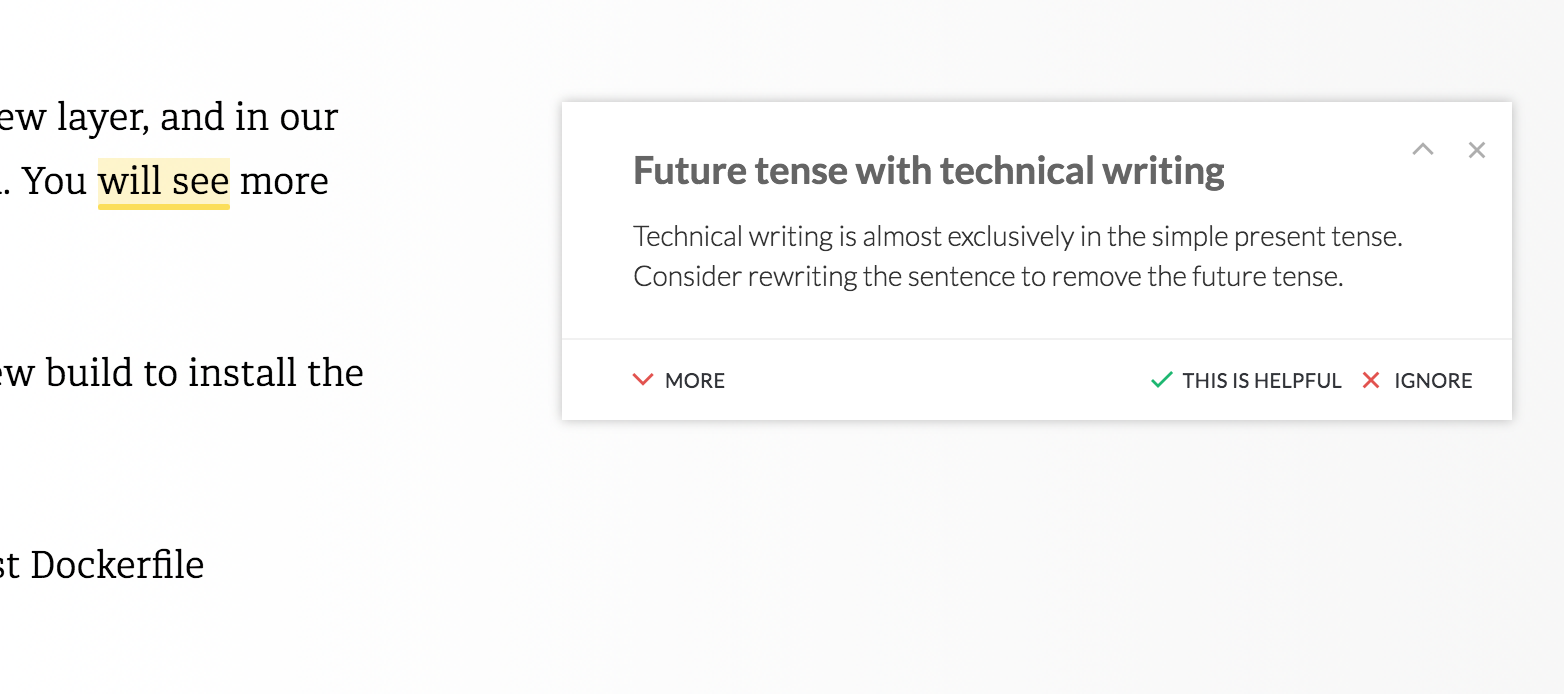
An example of the future tense:
“The user will click on Save. The computer will save the file to the hard drive.”
Here’s the same text in the simple present tense:
“The user clicks on Save. The computer saves the file to the hard drive.”
The simple present tense is typically easier to follow, especially if the user has to perform any actions.
I can’t emphasize enough how much time Grammarly can save you! Even if you don’t keep the subscription, use it during the editing phase. It will pay for itself, and I use it every day.
After each chapter, I commit the results (or even as I go) to GitHub. If I have to stop in the middle of a section, I leave a hint in a commit message like “Chapter 5 WIP - Left off on Listing 5.5.”
Manual Editing
After getting the apparent grammar mistakes ironed out, you could pass your manuscript off to a freelance editor. Editing is a tedious, time-consuming process, that takes many rounds.
Even after rounds and rounds of editing, you will find new mistakes, and weird sentences that you feel need to be reworked.
I like editing, so I just methodically take my time and commit small chunks of progress.
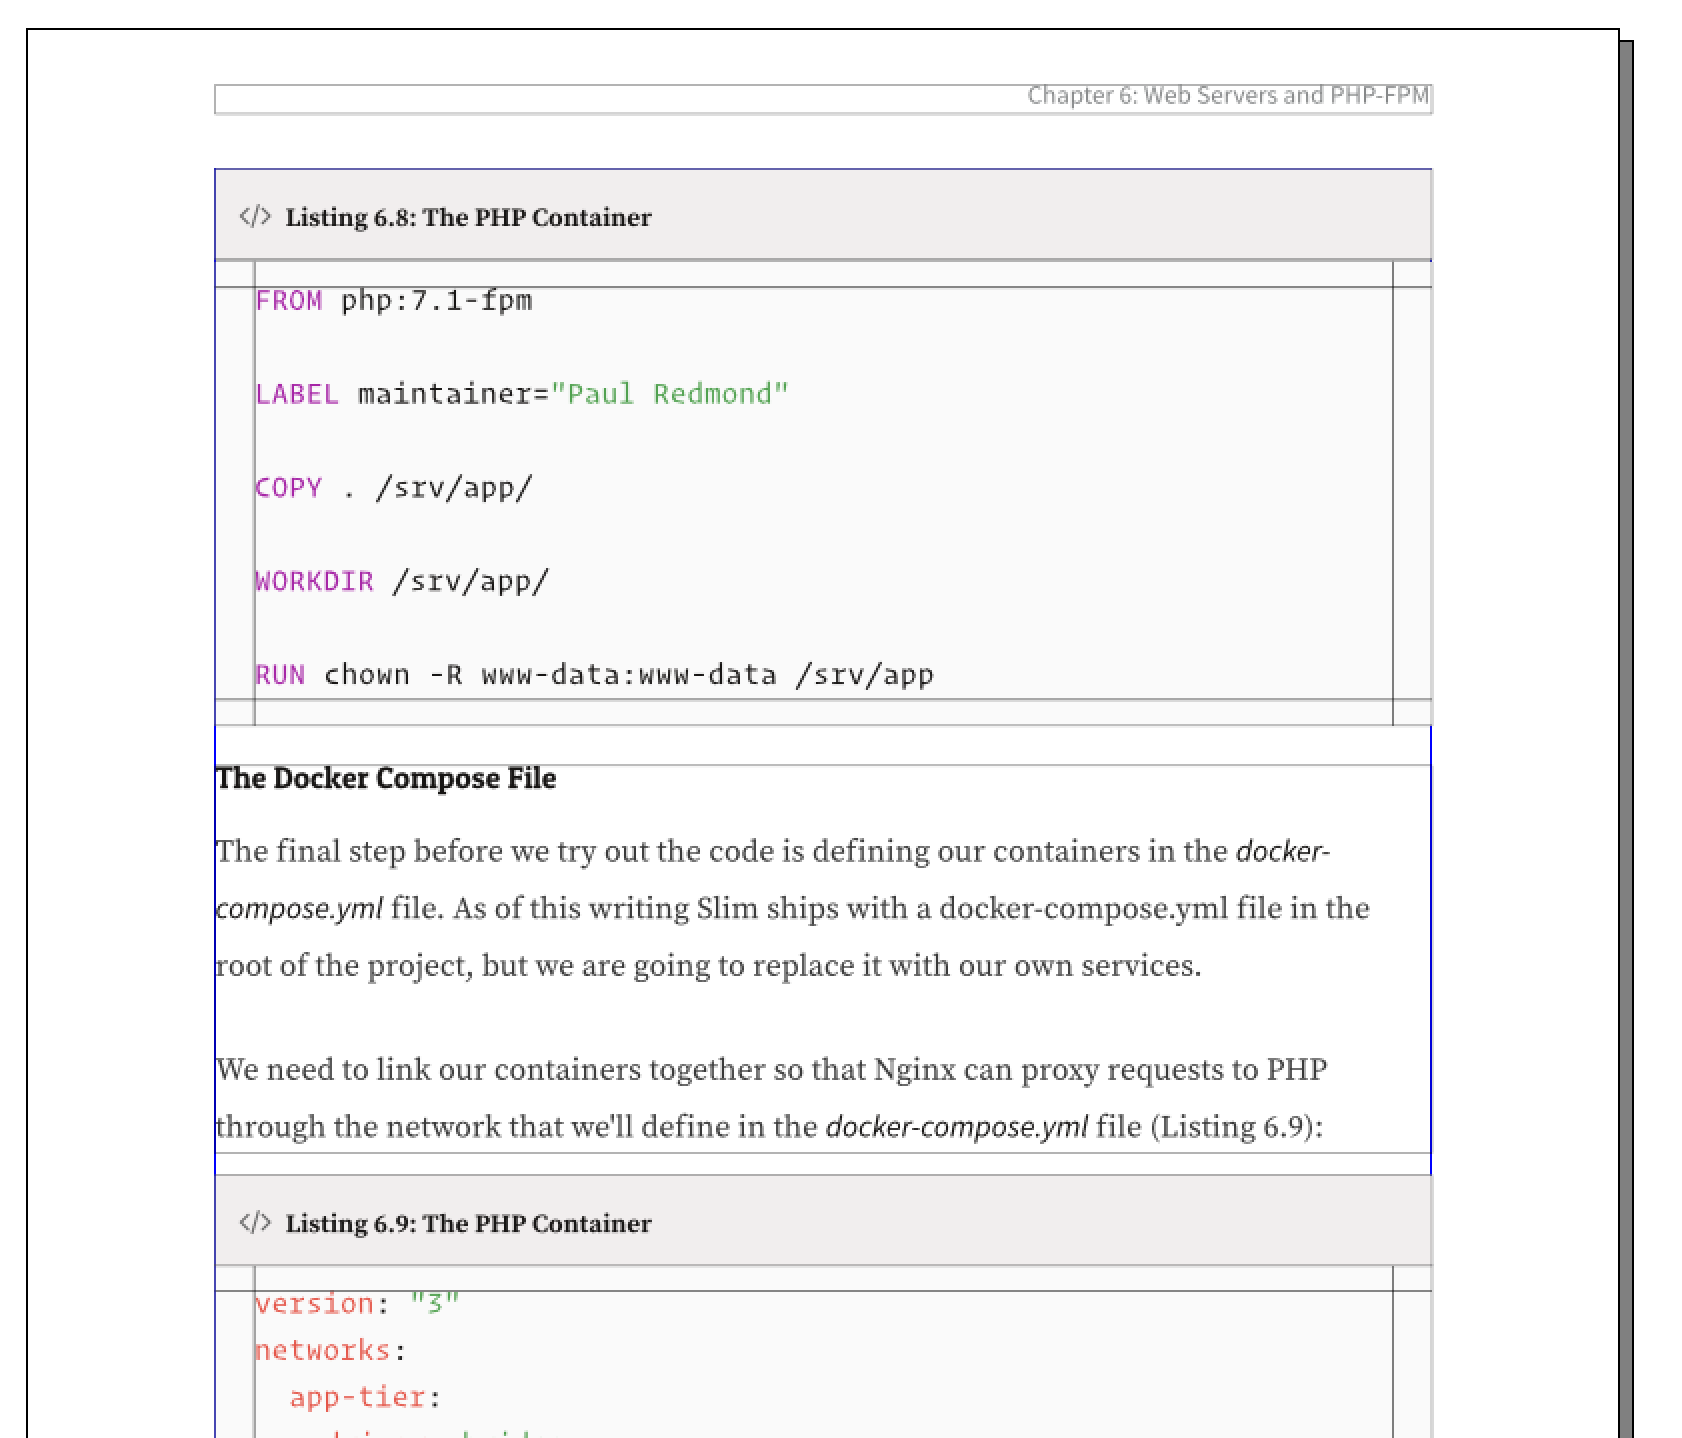
I also find it helpful to read the text from the generated PDF. There’s something about reading the formatted version rather than the manuscript that helps you spot errors you wouldn’t otherwise see in your editor.
I typically keep the PDF and editor open side-by-side so I can rework sentences that don’t read correctly or could be simplified. At this stage, I also cut out unnecessary repetition, or even entire sentences and paragraphs.
I involve my wife and other non-technical friends in this process, because they ask interesting questions you might not consider as someone more experienced in your topic, and find grammar issues from a different perspective.
I probably re-read each chapter between five and ten times, looking for any rough transitions, confusing jargon, and make sure the flow of the sections and paragraphs make sense.
Technical Editing
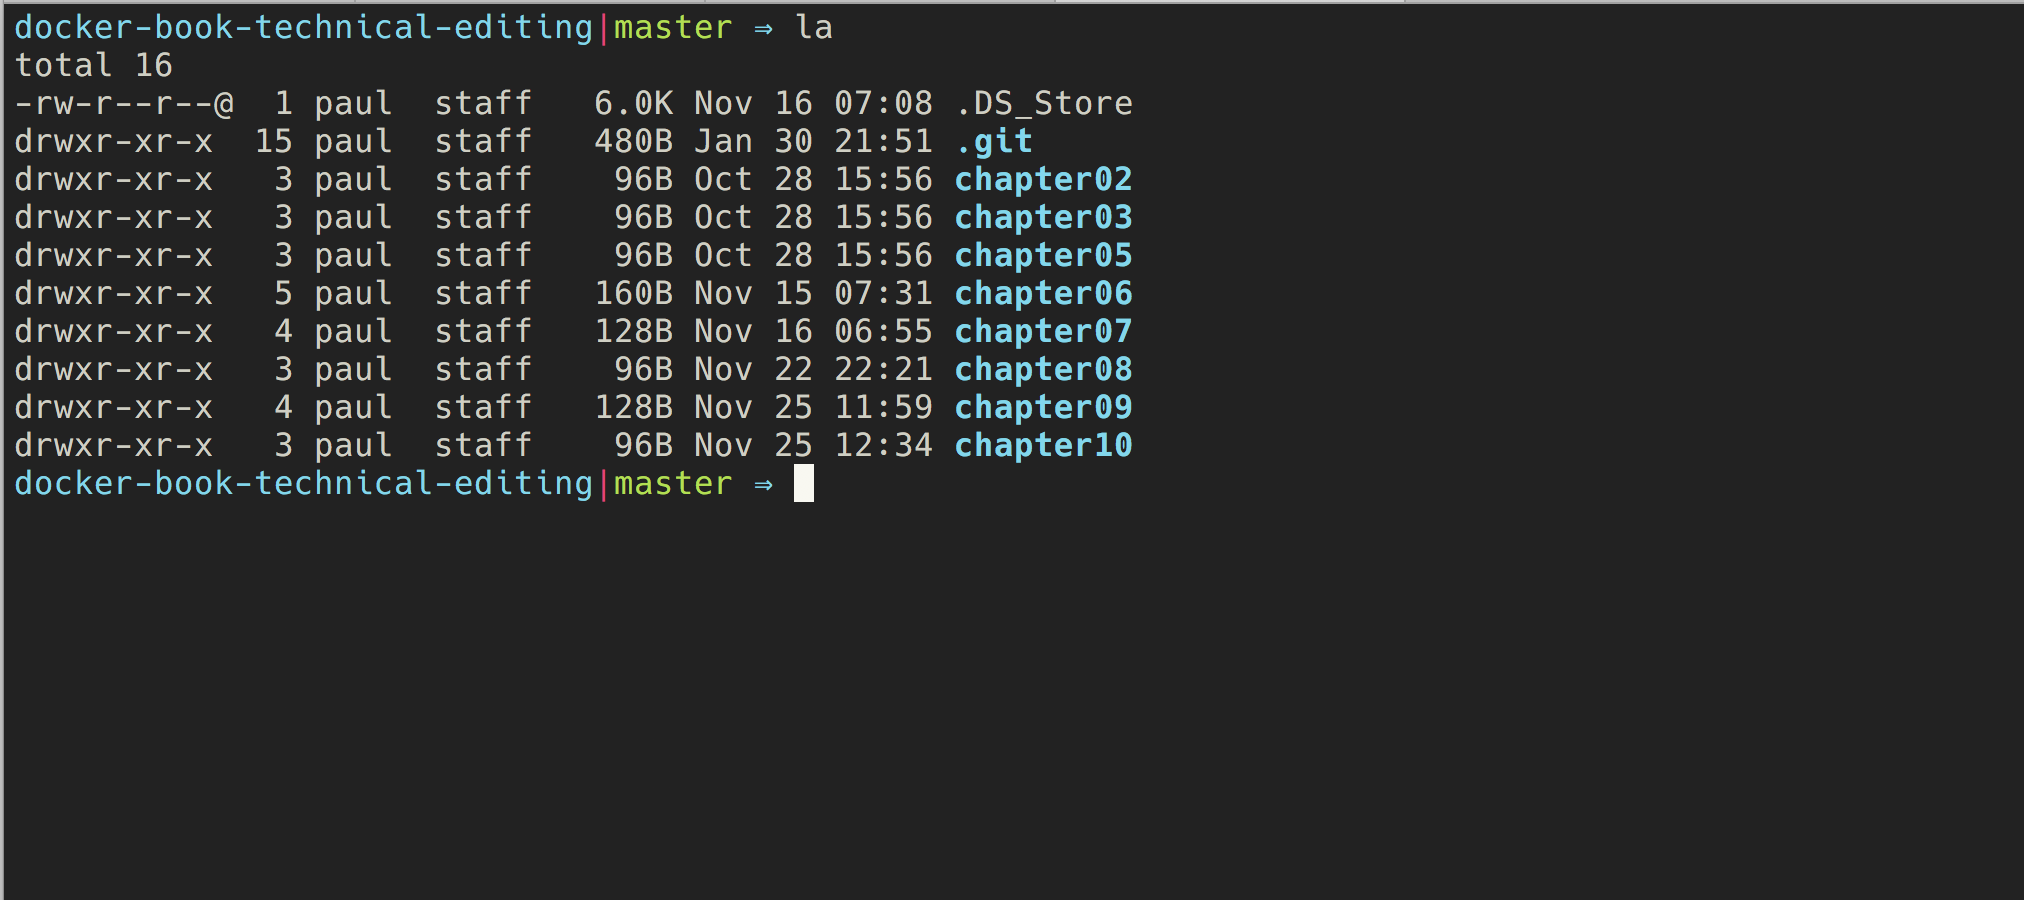
My first task when I do technical editing is to ignore the text and run each code listing that is intended to be executed or ran as part of a hands-on tutorial. I create a new repo from scratch and organize it into chapters as I run through the code and make sure each listing works as expected on multiple platforms:
If you are writing a book on a programming language, you can use TDD to write your book, and I promise that you’ll trim down on your errata.
I had a great experience writing my book code with TDD, and I have had minimal errata reported. Even if the tests don’t belong in the context of the book, they will help you avoid errors in your code listings.
I go through the code examples just like chapter text editing, one chapter at a time. I search for listings to make sure that I didn’t skip any and that any mention of Listing in the text matches the intended listing number.
For example, editing Chapter 5, I would search for all instances of “Listing 5.” and verify all references.
Here are some important things to consider when planning out the technical side of your writing:
- Is the next major version of the framework or code coming out soon? For example, are you writing code in PHP 5.6 right before PHP 7 is about to come out?
- Do my installation instructions ensure they will install the correct version?
- How quickly could I upgrade the listings when the next release comes out?
- Does the code work on all major platforms like Windows, OS X, and Linux?
My list above is just an example of some of the questions you should consider; it’s not an all-encompassing list; however, you need to realize that a PDF version is a little more permanent than other mediums, and try to make the listings resilient so you can update the book more easily.
I work with PHP and Composer, so one way I might defensively make sure that my code will work with new versions of software is to use Composer instead of installer tools:
# Use composer for creating a new project instead of an installer...

# Instead of this...
$ laravel new my-app

# Prefer this....
$ composer create-project --prefer-dist laravel/laravel:5.5 my-app
One benefit of self-publishing e-books is that I can quickly release updates and errata that might prove more difficult for a more prominent publisher or a printed book, but I still try to make it easy to upgrade my book.
Getting Ready for Publication
Leanpub allows you to easily publish your book whenever you want. If you buy in to iteratively releasing your book, you can release new versions early in the process, getting reader feedback earlier in the process.
I like to write in secret and release all at once. This time around, I chose to create my custom PDF design, so I wanted to have high confidence that my text was thoroughly edited. Setting each paragraph and code sample, and then aligning everything up is tedious work, but I wanted to control every aspect of the look and feel:
I am not going to go into great detail on the process of porting my book from a markdown manuscript to a custom PDF in a design program; I’ll save that for another post!
I found more bad grammar and strangely worded text at this stage, so as I translated the book to the PDF design I was making minor editing corrections.
Just like my editing process, I create one chapter at a time and export the chapter to PDF for review. Finally, I go over the entire text one last time once I finish building the final pages.
All in all, it was a timely process, but I think the result was worth it and I learned a bunch about crafting my own PDF.
Closing Thoughts
Writing a book takes tremendous effort, but if you break it down, it’s not as hard as it seems to write a 30-50,000 word book.
The one thing that separates would-be authors from anyone else is execution and follow-through. But at the same time, writing a book is complicated and takes some practice and patience.
Docker for PHP Developers ended up around 38,493 words, which is an average of 3,800 words per chapter.
Another way to think of it is writing longer ten blog posts, and you mainly have a book.
You could even start writing five posts on a topic to see if the remainder is worth pursuing or publish a shorter book.
This post is roughly 4,000 words—write nine more posts, and you have a 40,000-word book! Write two posts a month, and you have 40,000 words in five months.
The key for me is focusing on one chapter at a time.
I hope that I’ve shared something that inspires you to consider writing your book or tutorial. It’s a labor of love, but the results of self-publishing my books has been a rewarding process!
If you’re working on something and have questions that I can help with, I am @paulredmond on Twitter!

Paul Redmond
Hey, I'm Paul. I am a full stack developer. I write books like Docker for PHP Developers and Lumen Programming Guide (Apress), and I write for Laravel News. I love PHP, Ruby, Node.js, DevOps, and Docker.